giovedì 2 maggio 2019

Emulatore CHIP-8 su NCurses

Questo e' un post intermedio a cui seguira' la creazione di un emulatore CHIP-8 su Arduino


CHIP-8 e' un linguaggio di programmazione interpretato che girava in macchina virtuale su macchine di fine anni 70 come COSMAC VIP
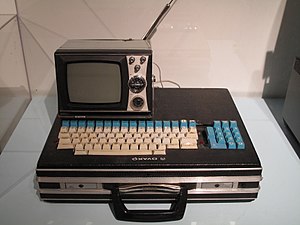
TelMac 1800


La partenza di tutto e' un codice di James Griffin disponibile su GitHub che simula CHIP-8 mediante la libreria SDL

Per semplificare il progetto da portare su Arduino ho creato un progetto intermedio con grafica testuale con NCurses che rimuove la dipendenza dal file system (la rom non viene piu' caricata da un file ma e' inclusa in modo statico in un array nel codice..nel file main.cpp c'e' un programma MAZE commentato ed un programma PONG non commentato)

main.cpp
---------------------------------------------------------------
#include <chrono>
#include <thread>
#include "stdint.h"
#include <curses.h>
#include <math.h>

#include "chip8.h"

using namespace std;
//MAZE
/*
static unsigned char prg[] =
{
    0xA2,0x1E, 0xC2, 0x01, 0x32, 0x01, 0xA2, 0x1A,
    0xD0,0x14, 0x70, 0x04, 0x30, 0x40, 0x12, 0x00,
    0x60,0x00, 0x71, 0x04, 0x31, 0x20, 0x12, 0x00,
    0x12,0x18, 0x80, 0x40, 0x20, 0x10, 0x20, 0x40,
    0x80,0x10
};
*/

//PONG

static unsigned char prg[] =
{
    0x6A,0x02, 0x6B, 0x0C, 0x6C, 0x3F, 0x6D, 0x0C,
    0xA2,0xEA, 0xDA, 0xB6, 0xDC, 0xD6, 0x6E, 0x00,
    0x22,0xD4, 0x66, 0x03, 0x68, 0x02, 0x60, 0x60,
    0xF0,0x15, 0xF0, 0x07, 0x30, 0x00, 0x12, 0x1A,
    0xC7,0x17, 0x77, 0x08,

    0x69,0xFF, 0xA2, 0xF0, 0xD6, 0x71, 0xA2, 0xEA,
    0xDA,0xB6, 0xDC, 0xD6, 0x60, 0x01, 0xE0, 0xA1,
    0x7B,0xFE, 0x60, 0x04, 0xE0, 0xA1, 0x7B, 0x02,
    0x60,0x1F, 0x8B, 0x02, 0xDA, 0xB6, 0x60, 0x0C,
    0xE0,0xA1, 0x7D, 0xFE,

    0x60,0x0D, 0xE0, 0xA1, 0x7D, 0x02, 0x60, 0x1F,
    0x8D,0x02, 0xDC, 0xD6, 0xA2, 0xF0, 0xD6, 0x71,
    0x86,0x84, 0x87, 0x94, 0x60, 0x3F, 0x86, 0x02,
    0x61,0x1F, 0x87, 0x12, 0x46, 0x02, 0x12, 0x78,
    0x46,0x3F, 0x12, 0x82,

    0x47,0x1F, 0x69, 0xFF, 0x47, 0x00, 0x69, 0x01,
    0xD6,0x71, 0x12, 0x2A, 0x68, 0x02, 0x63, 0x01,
    0x80,0x70, 0x80, 0xB5, 0x12, 0x8A, 0x68, 0xFE,
    0x63,0x0A, 0x80, 0x70, 0x80, 0xD5, 0x3F, 0x01,
    0x12,0xA2, 0x61, 0x02,

    0x80,0x15, 0x3F, 0x01, 0x12, 0xBA, 0x80, 0x15,
    0x3F,0x01, 0x12, 0xC8, 0x80, 0x15, 0x3F, 0x01,
    0x12,0xC2, 0x60, 0x20, 0xF0, 0x18, 0x22, 0xD4,
    0x8E,0x34, 0x22, 0xD4, 0x66, 0x3E, 0x33, 0x01,
    0x66,0x03, 0x68, 0xFE,

    0x33,0x01, 0x68, 0x02, 0x12, 0x16, 0x79, 0xFF,
    0x49,0xFE, 0x69, 0xFF, 0x12, 0xC8, 0x79, 0x01,
    0x49,0x02, 0x69, 0x01, 0x60, 0x04, 0xF0, 0x18,
    0x76,0x01, 0x46, 0x40, 0x76, 0xFE, 0x12, 0x6C,
    0xA2,0xF2, 0xFE, 0x33,

    0xF2,0x65, 0xF1, 0x29, 0x64, 0x14, 0x65, 0x00,
    0xD4,0x55, 0x74, 0x15, 0xF2, 0x29, 0xD4, 0x55,
    0x00,0xEE, 0x80, 0x80, 0x80, 0x80, 0x80, 0x80,
    0x80,0x00, 0x00, 0x00, 0x00, 0x00

};

int tasto;

uint8_t keymap[16];

#define SCREEN_WIDTH 64
#define SCREEN_HEIGHT 32


int main() {
    Chip8 chip8 = Chip8();

    initscr();
    cbreak();
    noecho();
    clear();
    timeout(0); // per fare kbhit non bloccante
    uint32_t pixels[2048];

    chip8.load(prg,sizeof(prg));

    while (true) {
        chip8.emulate_cycle();


        for (int f=0;f<16;++f)
            {
                chip8.key[f] = 0;
            }


        tasto = getch();

        switch (tasto)
        {
          case 49 :  //1
            chip8.key[1] = 1;
            break;
          case 113 :  //q
            chip8.key[4] = 1;
            break;
          case 97 :  //a
            chip8.key[7] = 1;
            break;
          case 122 :  //z
            chip8.key[10] = 1;
            break;
          case 50 :  //2
            chip8.key[2] = 1;
            break;
          case 119 :  //w
            chip8.key[5] = 1;
            break;
          case 115 :  //s
            chip8.key[8] = 1;
            break;
          case 120 :  //x
            chip8.key[0] = 1;
            break;
          case 51 :  //3
            chip8.key[3] = 1;
            break;
          case 101 :  //e
            chip8.key[6] = 1;
            break;
          case 100 :  //d
          chip8.key[9] = 1;
            break;
          case 99 :  //c
          chip8.key[11] = 1;
            break;
          case 52 :  //4
          chip8.key[12] = 1;
            break;
          case 114 :  //r
          chip8.key[13] = 1;
            break;
          case 102 :  //f
          chip8.key[14] = 1;
            break;
          case 118 :  //v
          chip8.key[15] = 1;
            break;
          case 27:
            endwin();
            exit(0);
            break;
          default:
          break;
        }


        if (chip8.drawFlag) {
            chip8.drawFlag = false;
            clear();
            for (int i = 0; i < 2048; ++i) {
                uint8_t pixel = chip8.gfx[i];
                int k = (int)i/64;
                int j = i%64;
                if (pixel == 1)
                {
                  move(k,j);
                  addch(ACS_CKBOARD);
                }
            }
            refresh();
        }
        std::this_thread::sleep_for(std::chrono::microseconds(12000));
    }
}

---------------------------------------------------------------

chip8.h
---------------------------------------------------------------
#ifndef CHIP_8_H
#define CHIP_8_H

#include <stdint.h>

class Chip8 {
private:
    uint16_t stack[16];                 // Stack
    uint16_t sp;                        // Stack pointer

    uint8_t memory[4096];               // Memory (4k)
    uint8_t V[16];                      // V registers (V0-VF)

    uint16_t pc;                        // Program counter
    uint16_t opcode;                    // Current op code
    uint16_t I;                         // Index register

    uint8_t delay_timer;                // Delay timer
    uint8_t sound_timer;                // Sound timer

    void init();

public:
    uint8_t  gfx[64 * 32];              // Graphics buffer
    uint8_t  key[16];                   // Keypad
    bool drawFlag;                      // Indicates a draw has occurred

    Chip8();
    ~Chip8();

    void emulate_cycle();               // Emulate one cycle
    bool load(unsigned char programma[],int size);   // Load application
};

#endif // CHIP_8_H
---------------------------------------------------------------

chip8.cpp
---------------------------------------------------------------
#include <stdio.h>
#include <stdlib.h>
#include <iostream>
#include <random>
#include "time.h"


#include "chip8.h"

unsigned char chip8_fontset[80] =
{
    0xF0, 0x90, 0x90, 0x90, 0xF0, //0
    0x20, 0x60, 0x20, 0x20, 0x70, //1
    0xF0, 0x10, 0xF0, 0x80, 0xF0, //2
    0xF0, 0x10, 0xF0, 0x10, 0xF0, //3
    0x90, 0x90, 0xF0, 0x10, 0x10, //4
    0xF0, 0x80, 0xF0, 0x10, 0xF0, //5
    0xF0, 0x80, 0xF0, 0x90, 0xF0, //6
    0xF0, 0x10, 0x20, 0x40, 0x40, //7
    0xF0, 0x90, 0xF0, 0x90, 0xF0, //8
    0xF0, 0x90, 0xF0, 0x10, 0xF0, //9
    0xF0, 0x90, 0xF0, 0x90, 0x90, //A
    0xE0, 0x90, 0xE0, 0x90, 0xE0, //B
    0xF0, 0x80, 0x80, 0x80, 0xF0, //C
    0xE0, 0x90, 0x90, 0x90, 0xE0, //D
    0xF0, 0x80, 0xF0, 0x80, 0xF0, //E
    0xF0, 0x80, 0xF0, 0x80, 0x80  //F
};


Chip8::Chip8() {}
Chip8::~Chip8() {}

// Initialise
void Chip8::init() {
    pc      = 0x200;    // Set program counter to 0x200
    opcode  = 0;        // Reset op code
    I     = 0;          // Reset I
    sp      = 0;        // Reset stack pointer

    // Clear the display
    for (int i = 0; i < 2048; ++i) {
        gfx[i] = 0;
    }

    // Clear the stack, keypad, and V registers
    for (int i = 0; i < 16; ++i) {
        stack[i]    = 0;
        key[i]      = 0;
        V[i]        = 0;
    }

    // Clear memory
    for (int i = 0; i < 4096; ++i) {
        memory[i] = 0;
    }

    // Load font set into memory
    for (int i = 0; i < 80; ++i) {
        memory[i] = chip8_fontset[i];
    }

    // Reset timers
    delay_timer = 0;
    sound_timer = 0;

    // Seed rng
    srand (time(NULL));
}

// Initialise and load ROM into memory
bool Chip8::load(unsigned char programma[],int size) {
    // Initialise
    init();

    //long rom_size = sizeof(programma);
    int rom_size = size;
    // Copy buffer to memory
    if ((4096-512) > rom_size){
        for (int i = 0; i < rom_size; ++i) {
            memory[i + 512] = (uint8_t)programma[i];   // Load into memory starting
                                                        // at 0x200 (=512)
        }
    }
    else {
        std::cerr << "ROM too large to fit in memory" << std::endl;
        return false;
    }

    return true;
}

// Emulate one cycle
void Chip8::emulate_cycle() {

    // Fetch op code
    opcode = memory[pc] << 8 | memory[pc + 1];   // Op code is two bytes

    switch(opcode & 0xF000){

        // 00E_
        case 0x0000:

            switch (opcode & 0x000F) {
                // 00E0 - Clear screen
                case 0x0000:
                    for (int i = 0; i < 2048; ++i) {
                        gfx[i] = 0;
                    }
                    drawFlag = true;
                    pc+=2;
                    break;

                // 00EE - Return from subroutine
                case 0x000E:
                    --sp;
                    pc = stack[sp];
                    pc += 2;
                    break;

                default:
                    printf("\nUnknown op code: %.4X\n", opcode);
                    exit(3);
            }
            break;

        // 1NNN - Jumps to address NNN
        case 0x1000:
            pc = opcode & 0x0FFF;
            break;

        // 2NNN - Calls subroutine at NNN
        case 0x2000:
            stack[sp] = pc;
            ++sp;
            pc = opcode & 0x0FFF;
            break;

        // 3XNN - Skips the next instruction if VX equals NN.
        case 0x3000:
            if (V[(opcode & 0x0F00) >> 8] == (opcode & 0x00FF))
                pc += 4;
            else
                pc += 2;
            break;

        // 4XNN - Skips the next instruction if VX does not equal NN.
        case 0x4000:
            if (V[(opcode & 0x0F00) >> 8] != (opcode & 0x00FF))
                pc += 4;
            else
                pc += 2;
            break;

        // 5XY0 - Skips the next instruction if VX equals VY.
        case 0x5000:
            if (V[(opcode & 0x0F00) >> 8] == V[(opcode & 0x00F0) >> 4])
                pc += 4;
            else
                pc += 2;
            break;

        // 6XNN - Sets VX to NN.
        case 0x6000:
            V[(opcode & 0x0F00) >> 8] = opcode & 0x00FF;
            pc += 2;
            break;

        // 7XNN - Adds NN to VX.
        case 0x7000:
            V[(opcode & 0x0F00) >> 8] += opcode & 0x00FF;
            pc += 2;
            break;

        // 8XY_
        case 0x8000:
            switch (opcode & 0x000F) {

                // 8XY0 - Sets VX to the value of VY.
                case 0x0000:
                    V[(opcode & 0x0F00) >> 8] = V[(opcode & 0x00F0) >> 4];
                    pc += 2;
                    break;

                // 8XY1 - Sets VX to (VX OR VY).
                case 0x0001:
                    V[(opcode & 0x0F00) >> 8] |= V[(opcode & 0x00F0) >> 4];
                    pc += 2;
                    break;

                // 8XY2 - Sets VX to (VX AND VY).
                case 0x0002:
                    V[(opcode & 0x0F00) >> 8] &= V[(opcode & 0x00F0) >> 4];
                    pc += 2;
                    break;

                // 8XY3 - Sets VX to (VX XOR VY).
                case 0x0003:
                    V[(opcode & 0x0F00) >> 8] ^= V[(opcode & 0x00F0) >> 4];
                    pc += 2;
                    break;

                // 8XY4 - Adds VY to VX. VF is set to 1 when there's a carry,
                // and to 0 when there isn't.
                case 0x0004:
                    V[(opcode & 0x0F00) >> 8] += V[(opcode & 0x00F0) >> 4];
                    if(V[(opcode & 0x00F0) >> 4] > (0xFF - V[(opcode & 0x0F00) >> 8]))
                        V[0xF] = 1; //carry
                    else
                        V[0xF] = 0;
                    pc += 2;
                    break;

                // 8XY5 - VY is subtracted from VX. VF is set to 0 when
                // there's a borrow, and 1 when there isn't.
                case 0x0005:
                    if(V[(opcode & 0x00F0) >> 4] > V[(opcode & 0x0F00) >> 8])
                        V[0xF] = 0; // there is a borrow
                    else
                        V[0xF] = 1;
                    V[(opcode & 0x0F00) >> 8] -= V[(opcode & 0x00F0) >> 4];
                    pc += 2;
                    break;

                // 0x8XY6 - Shifts VX right by one. VF is set to the value of
                // the least significant bit of VX before the shift.
                case 0x0006:
                    V[0xF] = V[(opcode & 0x0F00) >> 8] & 0x1;
                    V[(opcode & 0x0F00) >> 8] >>= 1;
                    pc += 2;
                    break;

                // 0x8XY7: Sets VX to VY minus VX. VF is set to 0 when there's
                // a borrow, and 1 when there isn't.
                case 0x0007:
                    if(V[(opcode & 0x0F00) >> 8] > V[(opcode & 0x00F0) >> 4]) // VY-VX
                        V[0xF] = 0; // there is a borrow
                    else
                        V[0xF] = 1;
                    V[(opcode & 0x0F00) >> 8] = V[(opcode & 0x00F0) >> 4] - V[(opcode & 0x0F00) >> 8];
                    pc += 2;
                    break;

                // 0x8XYE: Shifts VX left by one. VF is set to the value of
                // the most significant bit of VX before the shift.
                case 0x000E:
                    V[0xF] = V[(opcode & 0x0F00) >> 8] >> 7;
                    V[(opcode & 0x0F00) >> 8] <<= 1;
                    pc += 2;
                    break;

                default:
                    printf("\nUnknown op code: %.4X\n", opcode);
                    exit(3);
            }
            break;

        // 9XY0 - Skips the next instruction if VX doesn't equal VY.
        case 0x9000:
            if (V[(opcode & 0x0F00) >> 8] != V[(opcode & 0x00F0) >> 4])
                pc += 4;
            else
                pc += 2;
            break;

        // ANNN - Sets I to the address NNN.
        case 0xA000:
            I = opcode & 0x0FFF;
            pc += 2;
            break;

        // BNNN - Jumps to the address NNN plus V0.
        case 0xB000:
            pc = (opcode & 0x0FFF) + V[0];
            break;

        // CXNN - Sets VX to a random number, masked by NN.
        case 0xC000:
            V[(opcode & 0x0F00) >> 8] = (rand() % (0xFF + 1)) & (opcode & 0x00FF);
            pc += 2;
            break;

        // DXYN: Draws a sprite at coordinate (VX, VY) that has a width of 8
        // pixels and a height of N pixels.
        // Each row of 8 pixels is read as bit-coded starting from memory
        // location I;
        // I value doesn't change after the execution of this instruction.
        // VF is set to 1 if any screen pixels are flipped from set to unset
        // when the sprite is drawn, and to 0 if that doesn't happen.
        case 0xD000:
        {
            unsigned short x = V[(opcode & 0x0F00) >> 8];
            unsigned short y = V[(opcode & 0x00F0) >> 4];
            unsigned short height = opcode & 0x000F;
            unsigned short pixel;

            V[0xF] = 0;
            for (int yline = 0; yline < height; yline++)
            {
                pixel = memory[I + yline];
                for(int xline = 0; xline < 8; xline++)
                {
                    if((pixel & (0x80 >> xline)) != 0)
                    {
                        if(gfx[(x + xline + ((y + yline) * 64))] == 1)
                        {
                            V[0xF] = 1;
                        }
                        gfx[x + xline + ((y + yline) * 64)] ^= 1;
                    }
                }
            }

            drawFlag = true;
            pc += 2;
        }
            break;

        // EX__
        case 0xE000:

            switch (opcode & 0x00FF) {
                // EX9E - Skips the next instruction if the key stored
                // in VX is pressed.
                case 0x009E:
                    if (key[V[(opcode & 0x0F00) >> 8]] != 0)
                        pc +=  4;
                    else
                        pc += 2;
                    break;

                // EXA1 - Skips the next instruction if the key stored
                // in VX isn't pressed.
                case 0x00A1:
                    if (key[V[(opcode & 0x0F00) >> 8]] == 0)
                        pc +=  4;
                    else
                        pc += 2;
                    break;

                default:
                    printf("\nUnknown op code: %.4X\n", opcode);
                    exit(3);
            }
            break;

        // FX__
        case 0xF000:
            switch(opcode & 0x00FF)
            {
                // FX07 - Sets VX to the value of the delay timer
                case 0x0007:
                    V[(opcode & 0x0F00) >> 8] = delay_timer;
                    pc += 2;
                    break;

                // FX0A - A key press is awaited, and then stored in VX
                case 0x000A:
                {
                    bool key_pressed = false;

                    for(int i = 0; i < 16; ++i)
                    {
                        if(key[i] != 0)
                        {
                            V[(opcode & 0x0F00) >> 8] = i;
                            key_pressed = true;
                        }
                    }

                    // If no key is pressed, return and try again.
                    if(!key_pressed)
                        return;

                    pc += 2;
                }
                    break;

                // FX15 - Sets the delay timer to VX
                case 0x0015:
                    delay_timer = V[(opcode & 0x0F00) >> 8];
                    pc += 2;
                    break;

                // FX18 - Sets the sound timer to VX
                case 0x0018:
                    sound_timer = V[(opcode & 0x0F00) >> 8];
                    pc += 2;
                    break;

                // FX1E - Adds VX to I
                case 0x001E:
                    // VF is set to 1 when range overflow (I+VX>0xFFF), and 0
                    // when there isn't.
                    if(I + V[(opcode & 0x0F00) >> 8] > 0xFFF)
                        V[0xF] = 1;
                    else
                        V[0xF] = 0;
                    I += V[(opcode & 0x0F00) >> 8];
                    pc += 2;
                    break;

                // FX29 - Sets I to the location of the sprite for the
                // character in VX. Characters 0-F (in hexadecimal) are
                // represented by a 4x5 font
                case 0x0029:
                    I = V[(opcode & 0x0F00) >> 8] * 0x5;
                    pc += 2;
                    break;

                // FX33 - Stores the Binary-coded decimal representation of VX
                // at the addresses I, I plus 1, and I plus 2
                case 0x0033:
                    memory[I]     = V[(opcode & 0x0F00) >> 8] / 100;
                    memory[I + 1] = (V[(opcode & 0x0F00) >> 8] / 10) % 10;
                    memory[I + 2] = V[(opcode & 0x0F00) >> 8] % 10;
                    pc += 2;
                    break;

                // FX55 - Stores V0 to VX in memory starting at address I
                case 0x0055:
                    for (int i = 0; i <= ((opcode & 0x0F00) >> 8); ++i)
                        memory[I + i] = V[i];

                    // On the original interpreter, when the
                    // operation is done, I = I + X + 1.
                    I += ((opcode & 0x0F00) >> 8) + 1;
                    pc += 2;
                    break;

                case 0x0065:
                    for (int i = 0; i <= ((opcode & 0x0F00) >> 8); ++i)
                        V[i] = memory[I + i];

                    // On the original interpreter,
                    // when the operation is done, I = I + X + 1.
                    I += ((opcode & 0x0F00) >> 8) + 1;
                    pc += 2;
                    break;

                default:
                    printf ("Unknown opcode [0xF000]: 0x%X\n", opcode);
            }
            break;

        default:
            printf("\nUnimplemented op code: %.4X\n", opcode);
            exit(3);
    }


    // Update timers
    if (delay_timer > 0)
        --delay_timer;

    if (sound_timer > 0)
        if(sound_timer == 1);
            // TODO: Implement sound
        --sound_timer;

}
---------------------------------------------------------------


sabato 20 aprile 2019

Ardino port busy su Debian

Cercando di fare l'upload di uno sketch sulla nuova arrivata, un clone cinese di una Arduino Esplora, mi sono trovato nei guai perche' ogni volta c'erano errori di scrittura, errori nella fase di verifica o addirittura tutto era bloccato da un messaggio di Port Busy


la soluzione a tutti i problemi non era nell'Arduino, ne' nel cavo ne' nella IDE...in pratica il pacchetto modem manager entra in conflitto con l'upload. Basta eseguire

apt-get purge modemmanager

e tutto funziona

martedì 16 aprile 2019

Classi in C++ con CMake ed Eclipse

Questa cosa di CMake mi sta iniziando a dare fastidio....(devo ogni volta capire come sono cambiate le cose rispetto a make)

Diciamo di avere questa stupida classe
schermo.cpp
---------------------------------------------------
#include "schermo.h"

void schermo::aggiorna()
{
schermo::matrice[1] = 100;
}

schermo::schermo() {
schermo::matrice[1]=0;
}

schermo::~schermo() {
}
------------------------------------------------------

schermo.h
------------------------------------------------------
#ifndef SCHERMO_H_
#define SCHERMO_H_

class schermo {
public:
schermo();
void aggiorna();
virtual ~schermo();
int matrice [100];
private:

};

#endif /* SCHERMO_H_ */
------------------------------------------------------

ed un altro altrettanto stupido codice che chiama la classe
ad.cpp
------------------------------------------------------
#include <iostream>
#include <string>
#include "schermo.h"

using namespace std;

schermo ss;

int main(int argc, char **argv) {
int numero = ss.matrice[1];
auto s = std::to_string(numero);
cout << s << endl;
ss.aggiorna();
numero = ss.matrice[1];
s = std::to_string(numero);
cout << s << endl;
return 0;
}
------------------------------------------------------

per compilare la classe nella liberia esterna si deve modificare il file CMakeLists.txt come segue nella parte evidenziata (cioe' richiamando sia il sorgente che l'header della classe)

------------------------------------------------------
cmake_minimum_required (VERSION 2.6)

project (ad)

add_executable(ad ad.cpp schermo.cpp schermo.h)

------------------------------------------------------


RealTone KP-460

Un altro esemplare funzionante di calcolatrice della seconda meta' degli anni 70 si e' aggiunto alla mia collezione. Una RealTone KP-460 made in Hong Kong con processore Western Digital FS1732-B. I contatti erano ovviamente ossidati ma non compromessi


Visto che le istruzioni sul mio modello sono poco leggibili ho ripreso questa immagine da questo sito


venerdì 12 aprile 2019

FTDI232 e Arduino Mini Pro

Dovendo fare un progetto microscopico ho dovuto tirare fuori una Arduino Mini Pro che non avevo mai usato. Per programmarla ho scoperto che non e' necessario saldare i pin sulla scheda


E' sufficiente appoggiare i pin del programmatore FTDI232 sulla Mini Pro e si ottiene una connessione sufficientemente stabile per programmare la scheda

giovedì 11 aprile 2019

Un microcontrollore all'improvviso

Mentre ero su un cantiere mi e' caduto l'occhio su questa schedina....l'ho presa per curiosita'....dovrebbe appartenere ad una luce da cantiere (quelle a luce rosse a forma di lanterna) ...anche per la presenza di un LDR


ma al centro c'e' un integrato sospetto targato 12F675, si tratta di un microcontrollore PIC. Probabilmente costava troppo fare il controllo dell'LDR ed il lampeggio con l'elettronica analogica che si e' preferito "sprecare" un microcontrollore (del resto costa meno di 30 cent euro al pezzo)

martedì 9 aprile 2019

Every circuit ....forever

Ho avuto modo di provare per un giorno Every circuit ... ma il tempo di prova era poco ed il giorno dopo, dopo le basi, volevo vedere ancora se c'erano dei componenti un po' piu' evoluti che valessero la pena di spendere 15 euro della versione completa... ma ovviamente non potevo per il blocco del periodo di prova...ho provato ad aggirare il problema


Per prima si cancella il cookie del sito. Da Chrome si digita la URL

chrome://settings/siteData

si cerca la stringa EveryCircuit e si cancella il cookie.
Fatto questo si puo' utilizzare un servizio di mail temporanea come https://temp-mail.org/ per attivare un nuovo account.

In conclusione ho fatto qualche altra prova. per un altro giorno ma non ho pagato il software. I componenti sono quelli base (a meno che non ne vengano sbloccati altri sulla versione a pagamento) e non vale la pena l'esborso

lunedì 8 aprile 2019

Arduino Nano Eleggo Old Bootloader

Stavo impazzendo con un clone di una Arduino Nano Elegoo perche' non riuscivo a caricare nessuno sketch


..quando e' saltato un messaggio su un forum che le Arduino Nano possono avere due bootloader e che si puo' selezionare dalla Arduino Ide. Nel mio caso era da selezionare Old Bootloader


venerdì 5 aprile 2019

Firmware update su Dragino LG01

Per aggiornare il firmware OpenWrt (non la MCU) di un Dragino Lora Gateway LG-01 si scarica il file dragino-IoT--v4.3.6-squashfs-sysupgrade.bin da qui

http://www.dragino.com/downloads/index.php?dir=motherboards/ms14/Firmware/IoT/IoT--build-v4.3.6-20190305-2356/

Si va poi in System/Backup Flashfirmware/ Flash new firmware image


e si attende il reboot


LoraWan TheThingsNetwork con Arduino MKR1300

Dopo aver settato il gateway Dragino LG-01 vediamo come poter trasmettere i dati al cloud di TheThingsNetwork

Le impostazioni del gateway per LoraWAN sono le seguenti

Come si vede e' stato impostato uno spreading factor di 7, bandwith 125 KHz e CR 4 per una velocita' di circa 3400 bps. Tali valori devono essere compatibili con quelli dello sketch

Per prima cosa si imposta crea (dopo aver il gateway funzionante ed onlinea) una Application sulla console di TTN


dopo aver creato una App si devono creare i Devices
Ogni device e' identificato dal proprio EUI. Questo codice esadecimale puo' essere letto per esempio lanciando lo sketch FirstConfiguration degli esempi della libreria MKRWAN


Si passa poi alla programmazione Arduino.
Il dispositivo MKR1300 viene attivato come ABP (activation by personalization) e non OTAA. Mi e' stato spiegato sul forum di Arduino che Dragino LG-01 e' un gateway monocanale e gestisce solo ABP

E' stato modificato lo script di esempio LoraSendandReceive (eliminado la parte di ricezione che non mi serve). In giallo le modifiche sostanziali
----------------------------------------
#include <MKRWAN.h>

LoRaModem modem;

String devAddr;
String nwkSKey;
String appSKey;

void setup() {
  Serial.begin(115200);
  if (!modem.begin(EU868)) {
    Serial.println("Failed to start module");
    while (1) {}
  };
//chiavi
devAddr = "26011xxxx";
nwkSKey = "C05AB32C3F7B4Dxxxxxxxxxxxxxxxxxx";
appSKey = "1C8567078CB4613B168xxxxxxxxxxxxxx";

    int connected = modem.joinABP(devAddr, nwkSKey, appSKey);
    if (!connected) {
    Serial.println("Errore di connessione");
    while (1) {}
  }
    {
    Serial.println("connesso");
    }
}

void loop() {
  modem.setPort(3);
  modem.setADR(true);
  modem.dataRate(5);
  delay(5000);
  modem.minPollInterval(60);
  
  String msg = "Luca";


  int err;
  modem.beginPacket();
  modem.print(msg);
  err = modem.endPacket(false);
  if (err > 0) {
    Serial.println("Message sent correctly!");
  } else {
    Serial.println("Error sending message :(");
  }

  delay(20000);
}
----------------------------------------

Ed ecco apparire i dati sul cloud


In questo modo i dati sono pero' abbastanza inutili ..
Per processarli sullla propria macchina conviene abilitare una Integration dalla console di TTN ed nel mio caso in particolare il Data Storage


con questa modalita' i dati vengono conservati per 7 giorni

sul servizio Swagger


da cui  i dati possono essere scaricati mediante una chiamata CURL (dopo aver autorizzato il servizio mediante apposita chiave)

curl -X GET --header 'Accept: application/json' --header 'Authorization: key ttn-account-v2.p-Sxxxxxxx' 'https://hello_world_mkr1300.data.thethingsnetwork.org/api/v2/query'

e questo e' un esempio di dato ricevuto 

{"device_id":"mkr1300_1","raw":"THVjYTI=","time":"2019-04-05T08:54:01.208249737Z"}

altrimenti si possono scaricare i dati mediante Python con 

-----------------------------------------------------
import time
import ttn

app_id = "hello_world_mkr1300"
access_key = "ttn-account-v2.g_-r8AT6eTxxxxxxxxxxxxxxxxxxxxxxxxxx"

def uplink_callback(msg, client):
  print("Received uplink from ", msg.dev_id)
  print(msg)
  print("\n")

handler = ttn.HandlerClient(app_id, access_key)

# using mqtt client
mqtt_client = handler.data()
mqtt_client.set_uplink_callback(uplink_callback)
mqtt_client.connect()
time.sleep(600)
mqtt_client.close()
---------------------------------------------------

i dati ricevuti sono molto piu' dettagliati rispetto a quelli di Swagger

('Received uplink from ', u'mkr1300_1')
MSG(dev_id=u'mkr1300_1', counter=177, app_id=u'hello_world_mkr1300', payload_raw=u'THVjYTI=', hardware_serial=u'A8610A3233258909', port=3, metadata=MSG(location_source=u'registry', data_rate=u'SF7BW125', modulation=u'LORA', altitude=50, longitude=11.290198, airtime=51456000, coding_rate=u'4/5', frequency=868100000, gateways=[MSG(gtw_id=u'eui-a840411bf188ffff', timestamp=2951977680, longitude=11, rf_chain=0, snr=7.8, time=u'2019-04-05T08:58:15.615108Z', latitude=43.111, rssi=-62, channel=7)], time=u'2019-04-05T08:58:15.719069012Z', latitude=43.758617))


giovedì 4 aprile 2019

Python API per TheThingsNetwork

Per interagire con le API di TheThingsNetwork via Python si deve prima installare la libreria via Python

pip install ttn

in seguito e' preferibile creare una Access Key appposita per l'accesso Python andando in Console di TTN Application/Nome Applicazione/Settings/Access Key e creare una nuova chiave che abbia i permessi per Settings/Devices/Messages (non e' strettamente necessario ma essendo uno script  puo' essere utile avere il controllo completo

--------------------------------------------------------------
import time
import ttn

app_id = "hello_world_mkr1300"
access_key = "mettere qui la access key prima generata"

def uplink_callback(msg, client):
  print("Received uplink from ", msg.dev_id)
  print(msg)

handler = ttn.HandlerClient(app_id, access_key)

# using mqtt client
mqtt_client = handler.data()
mqtt_client.set_uplink_callback(uplink_callback)
mqtt_client.connect()
time.sleep(60)
mqtt_client.close()

# using application manager client
app_client =  handler.application()
my_app = app_client.get()
print(my_app)
my_devices = app_client.devices()
print(my_devices)
--------------------------------------------------------------

Questo semplice script usa mqtt ed attende per 60 secondi eventuali messaggi di uplink dai device e poi nella parte in arancione  le configurazioni della app 

mercoledì 3 aprile 2019

Monostable, Bistable, Astable Multivibrator 555

Un piccolo promemoria di definizioni

Fonte Wikipedia. Configurazione Monostabile


Monostable: questa configurazione, detta anche One Shot, riceve un impulso e come conseguenza genera un impulso in uscita (indipendentemente dalla lunghezza dell'input) di una durata pari alla configurazione della circuito RC (tempo di carica). E' simile ad un Schmitt Trigger ma questo muta la lunghezza della riposta in base alla lunghezza dell'input

Bistable: anche detto Flip-Flop. Per ogni impulso in ingresso cambia il proprio stato da 0 a 1 e da 1 a 0

Astable : genera con continuita' una onda quadra. Puo' essere visto come due Monostabiti in sequenza in cui il primo out e' usato come ingresso del secondo

Aggiungere libreria ad un progetto Cmake

Abituato a -L -I per includere una libreria in un progetto C (tipo qui) mi sono dovuto convertire a CMake. Per includere una libreria (sia in Eclipse che in KDevelop), per esempio NCurses, si deve editare il file  CMakeLists.txt e aggiungere la riga

target_link_libraries(nome_progetto ncurses)

Update MKRWAN1300 firmware

AGGIORNAMENTO : come suggerito dal forum di Arduino c'e' un metodo molto piu' semplice. Si aggiorna la libreria MKRWAN e poi si lancia lo skecth MKRWANFWUpdate_standalone. Nella directory della libreria c'e' l'ultimo firmware disponibile senza la necesssita' di scaricarlo a parte


Per aggiornare il firmware di una Arduino MKR1300 si parte scaricando il firmware compilato da link https://github.com/arduino/mkrwan1300-fw/releases


Al momento di scrivere questa nota l'ultima release e' la 1.1.6 (la 1.1.9 non risulta in formato bin) mentre nella Mkr1300 che mi e' arrivata e' montato un ARD-078 1.1.5

Si copia il file mlm32l07x01.bin nella stessa directory dove e' presente lo sketch MKRWANFWUpdate_standalone incluso negli esempi della libreria MKRWAN e si lancia il comando da terminale

echo -n "const " > fw.h && xxd -i mlm32l07x01.bin >> fw.h

si lancia quindi  lo sketch ed aprendo il terminale seriale si vedranno i seguenti comandi


Wrote and verified address 0x08012700 (98%)
 Wrote and verified address 0x08012800 (98%)
 Wrote and verified address 0x08012900 (98%)
 Wrote and verified address 0x08012a00 (99%)
 Wrote and verified address 0x08012b00 (99%)
 Wrote and verified address 0x08012c00 (99%)
 Wrote and verified address 0x08012d00 (100%)
 Done.

Starting execution at address 0x08000000... done.
Flashing ok :)
ARD-078 1.1.6

LLama3 Anita

A seguito di questo post ho provato a vedere ho provato a vedere cosa accadeva ad utilizzare un modello specifico per la lingua italiana in...